Most people discover expanding security gates after a scare. A break-in down the block. Fresh pry marks on the back door. A contractor who swears he locked up, yet the inventory says otherwise. I have installed accordion security gates in loading bays that see forklifts all day, and I have fitted scissor security gates in boutique storefronts where the owner cared as much about sightlines as safety. Measuring and fitting https://collinkwmy456.cavandoragh.org/scissor-security-gates-with-child-safe-locking-mechanisms them well is half craft, half patience. Do it right and the gate glides, locks cleanly, and disappears when you need it to. Do it wrong and you inherit a clattering nuisance that binds on the first cold morning.
This is a long walk through the details a good installer watches: how to size an opening, what a wall can actually support, where tolerances bite, and why you should bring a notepad and a level even if you “measured it last time.” Whether you are outfitting security gates for business premises in a high-traffic corridor or beefing up a side-door on a light industrial space, the fundamentals are the same, with a few twists for commercial security gates and regional quirks like freeze-thaw gaps in places such as Kelowna.
What an expanding security gate really is
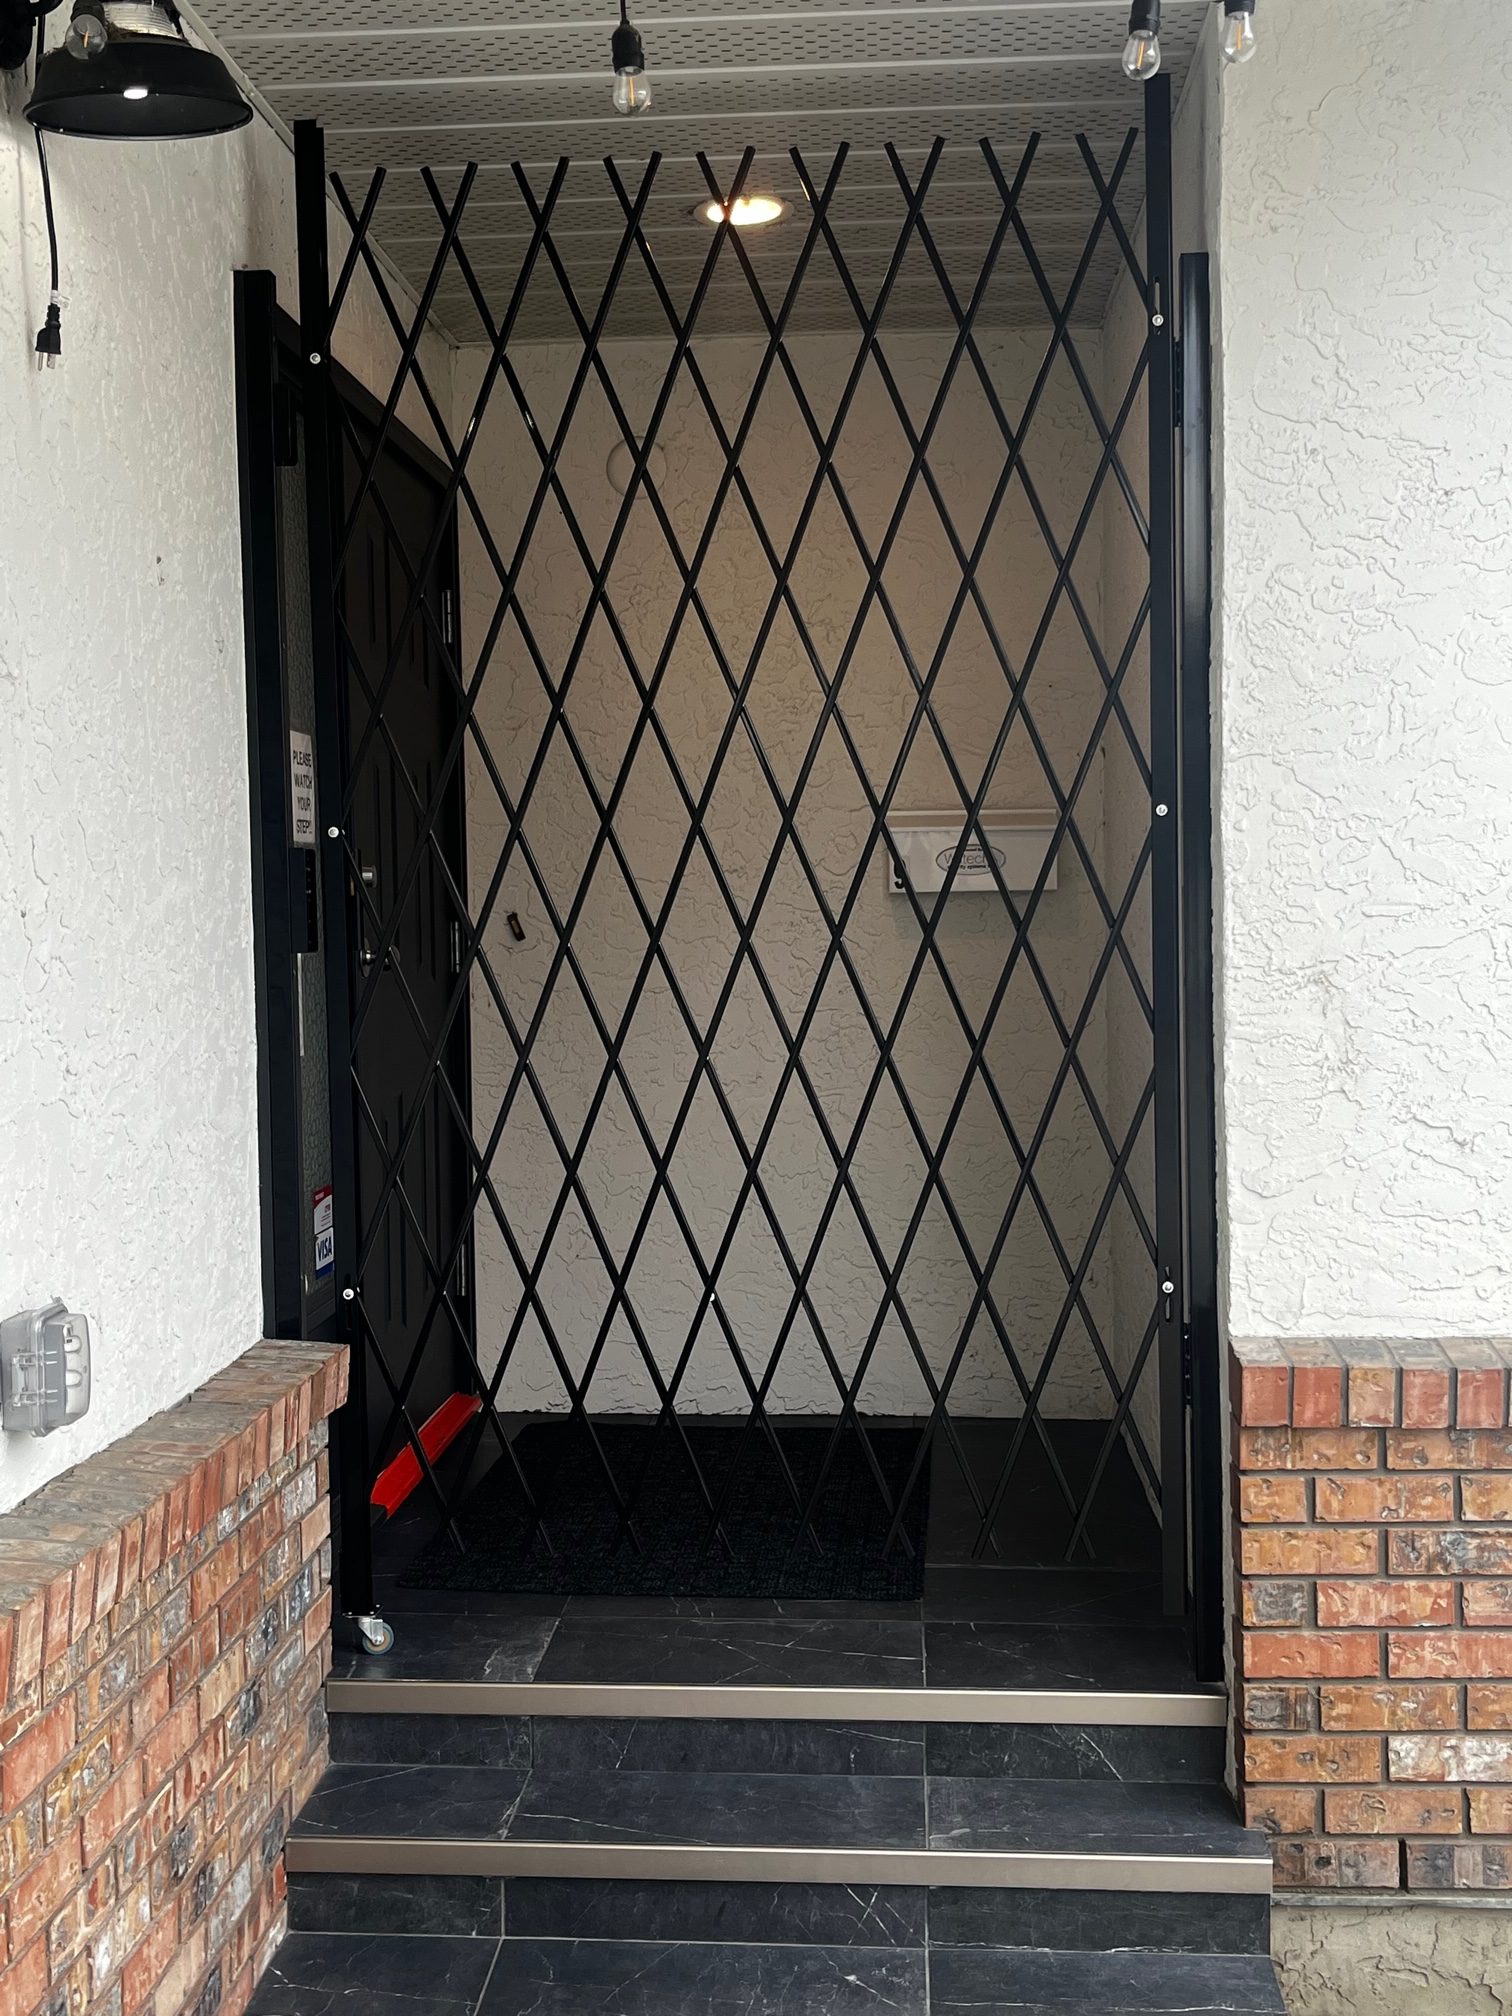
The terms can be confusing, so let’s get the cast of characters straight. An expanding security gate is a collapsible barrier that stacks compactly to one or both sides of an opening. People call them accordion security gates, scissor security gates, or concertina gates, and they usually mean the same thing: a lattice of steel or aluminum bars pivoting on riveted crosses, guided by top and sometimes bottom tracks, and secured with a lock post.
Commercial security gates get more rugged because they endure abuse. They live in dock doors, retail storefronts, school corridors, and data center anterooms. The build changes with duty rating, but the fitting logic does not. Your measurements decide whether the gate feels like a well-made drawer or a stubborn filing cabinet.
Planning the job before the tape touches the wall
The biggest error I see is measuring the hole and calling it a day. Gates interact with real-world messiness: out-of-plumb jambs, bowed drywall, spalled concrete, low-hanging sprinkler drops, service conduits, and expansion joints. They also need anchorage and room to stack. A proper plan answers three questions before any measurements:
- Where will the gate park when open, and will that stack location interfere with doors, lights, or displays? What will carry the load: wall surface, structural steel, concrete, wood blocking behind drywall, or a freestanding frame? How will the gate be used hourly, daily, or seasonally, and what footwear, carts, or forklifts will cross the threshold?
Those answers shape both the product choice and the mounting method. A light storefront gate that opens twice per day can hang top-only on wood blocking and a header bar. A warehouse gate across a twelve-foot roll-up opening that sees pallet jacks should ride both a top track and a low-profile bottom guide, with anchors into concrete. If you are sourcing locally, a security gate supplier who has worked your building type will spot these things faster than any catalog.
The anatomy that matters to measurement
Think about the gate in pieces, since each one imposes a dimension:
Head track or angle: This carries the weight and keeps the gate aligned. Some gates use a tubular track, others a simple angle or channel. Its depth and the brackets add to the required headroom.
Gate stack: When retracted, the lattice stacks into a bundle. The width of that stack depends on the number of panels and the grade of pivot points. A single-leaf seven-foot gate may stack around ten to fourteen inches. A double-leaf across a storefront can stack five to eight inches on each side. You need a place for that stack where it does not block ADA clearances, light switches, or alarm pulls.
Lock post: The receiving post sets the closed width and contains the lock. On double-leaf gates, the posts meet in the middle. On single-leaf gates, the post lands on the far jamb or a receiver plate. Allow room for the lock throw and any strike plate.
Bottom guide: Some designs run free across the floor, others rely on a bottom channel or “T” guide. If you have rolling carts, a low-profile bottom channel with bevels prevents trip hazards. If you cannot penetrate the floor, plan for side guides and a rigid top.
Clearance: Every moving assembly demands space to expand, contract, and twist a little. Temperature swings and building movement matter. For metal gates in a place like Kelowna, where you can see 35 Celsius in August and deep freeze in January, a few extra millimeters of lateral slop keep winter contraction from binding.
Measuring width, height, and the truth in between
A tape measure gives you numbers. Your job is to find the honest ones. Start with width and height at multiple points, then chase the deviations.
Width: Measure at floor level, mid-height, and near the head. Do it left to right and right to left, since worn tapes sag more than you think. I prefer readings in millimeters for precision, then I round up to the nearest 5 mm to keep some air. The narrowest width is your governing dimension, but record the widest too, because a large spread signals a bowed jamb or drywall swell that needs trimming or a filler.
Height: Check from finished floor to the underside of the header or the lowest obstruction along the full run. If you see sprinkler heads, duct drops, or exit signs, mark their positions. The lowest height governs, and you design the head track and brackets to stay clear. Measure top-to-bottom at left jamb, centerline, and right jamb. Floors crown and sag. A difference over 6 to 8 mm means you either shim the bottom guide or accept a stepped reveal.
Depth and reveal: If the gate mounts inside a recess or behind a mullion, measure the depth to obstructions. Some storefronts have roll-down shutters with housings that steal headroom. Some have tile bases that flare. Note sill heights and ramp transitions because they affect bottom guide selection.
Out-of-plumb and out-of-level: A two-foot level tells you whether the head will need shim packs or custom brackets. If the head is two degrees off, the gate will drift. On a long run, that drift becomes a jam. On steel columns, check for weld beads and bolt heads that a flat plate will not sit over without spacers.
Photos and sketches: Take them. Label where you stood and which direction you shot. Draw the plan with dimensions and call out the stack side, lock side, and swing zones. The worst installation headaches I have seen came from “I’ll remember” confidence.
Picking single-leaf, double-leaf, and center-meet setups
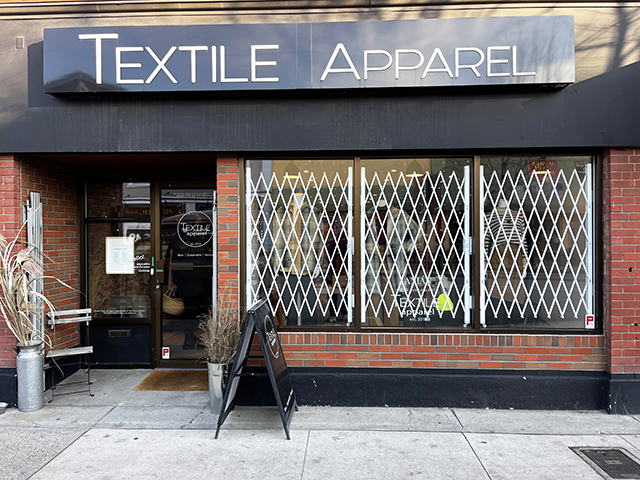
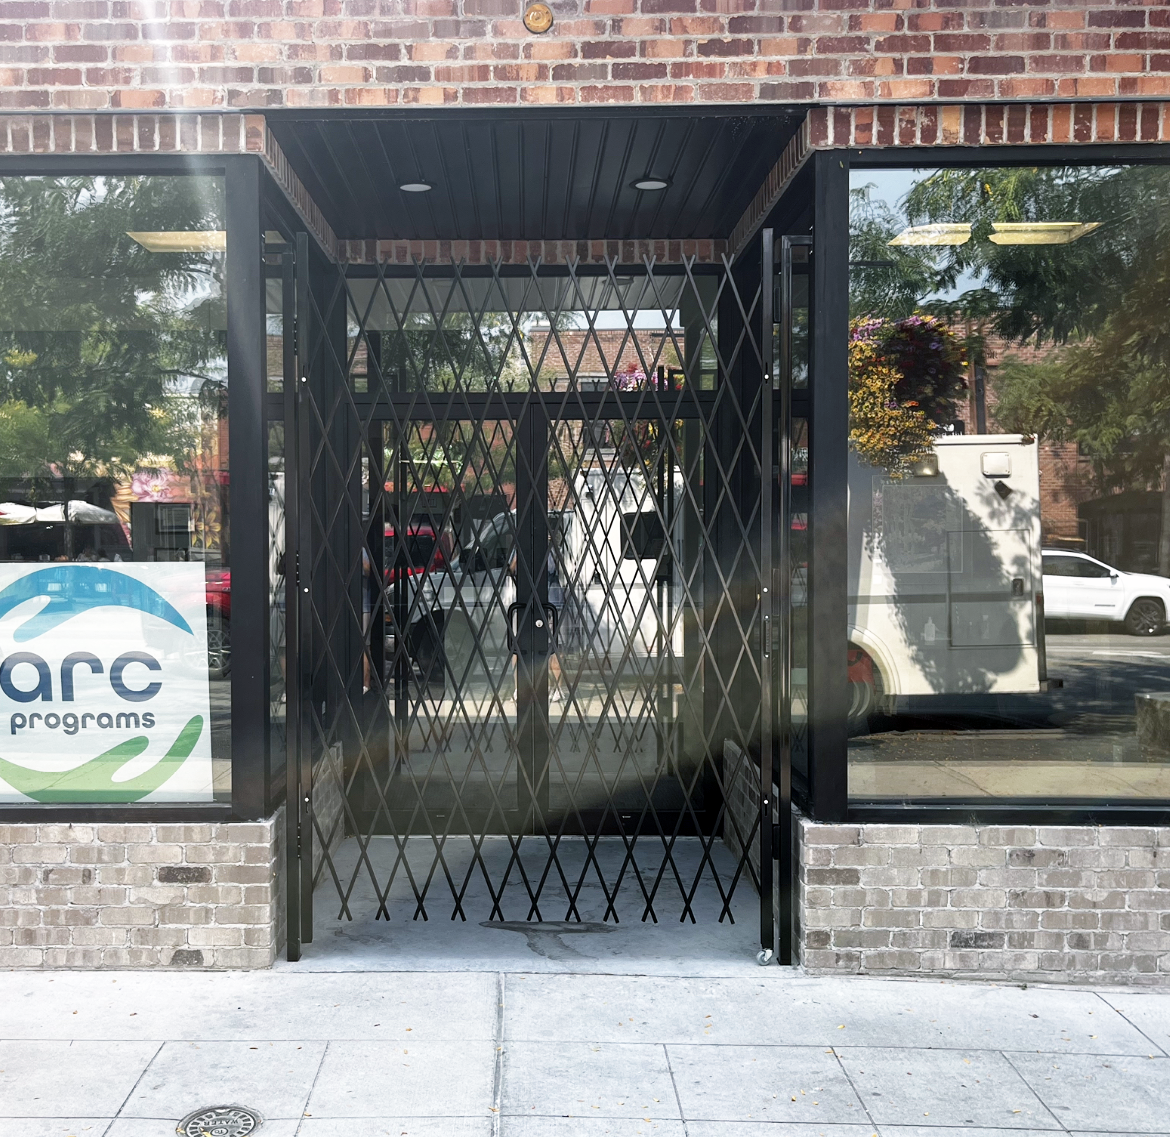
The opening width and how you use the space determine the leaf configuration. Single-leaf gates stack on one side and sweep across to latch to the opposite jamb. They excel in narrower openings or where one side has a convenient pilaster. Double-leaf, center-meet gates split the width and reduce stack intrusion on either side, which helps in storefronts where you want to keep product displays near both jambs. For very wide spans or areas that need a clear central aisle for carts, the center-meet style keeps traffic flow intuitive.
I once measured a bakery storefront where a single-leaf would have swallowed the merchandising table. The owner hated that. We switched to a center-meet, gained eight inches of display space on both sides, and made the gate feel lighter to move because each half carried half the load. The tradeoff was a slightly more complicated lock set where the posts met, but for a retail environment that was a fair deal.
Stack management that people forget
The gate is most visible when closed, but it annoys you when open. Plan for stack interference. Light switches behind a stack turn into comedy. Alarm panels tucked there turn into liability. On a school corridor I fitted years ago, a stack parked against a trophy case. It looked fine on paper. On game days, students gathered around that case and the gate scraped bags and elbows. We moved the stack side to put the bundle against drywall, and traffic flowed again. Think like a crowd. Think about the person with a ladder, the delivery crew with a dolly, and the one employee who always takes the shortest path.
If the stack must sit in a glass storefront, mind reflections. A matte black finish hides grime and disappears against most mullions. Silver looks crisp in the showroom but broadcasts fingerprints. The finish choice has nothing to do with strength, but it has everything to do with how likely the gate is to get wiped down.
Anchoring into reality, not just material names
“Metal stud” means different things from one building to the next. So does “concrete.” Your fastener choice and bracketry should match what you can actually penetrate, not what the drawings claimed.
Drywall over studs: Gates hung only to drywall will sag and tear. You need wood blocking or steel backing behind the gypsum, or a surface-applied spreader plate that picks up multiple studs. If you cannot open the wall, use toggle bolts strategically to place a reading load until you can find structure, then add longer structural anchors where the gate weight concentrates, typically at the stack side and lock post.
Masonry and concrete: Use mechanical anchors with proper embedment. For hollow CMU, try sleeve anchors that grab the shell or set epoxy with screen tubes. Do not anchor within two inches of a block edge unless you want to see a crack spider. In older brick, the mortar may be stronger than the brick face, so test your pilot holes in inconspicuous spots and expect to vary anchor size.
Steel: Self-drilling Tek screws bite into girts and tubes, but for thicker steel you will be happier with drilled holes and bolts with lock nuts. Paint the edges after drilling to inhibit rust. If welding brackets to a column is on the table, coordinate with the building owner. Fireproofing and permits can change the plan.
Wood: Lag bolts behave well if you predrill to the right diameter and depth. In old dimensional lumber, knots will throw you. Aim anchors slightly off centerlines to avoid hitting the same growth ring twice, which can lead to splitting.
In settings where you cannot touch the substrate at all, such as heritage brick or glass around a high-end retail display, consider a freestanding frame. The frame carries both the head and the gate, anchored at the floor along the base and possibly at the ceiling via compression posts. It is more work up front, but it saves you from improvising on installation day.
Headroom and clearances that keep gates gliding
Most expanding security gates are top-hung, so headroom is your lifeline. Measure from finished floor to the lowest obstruction along the entire run and subtract the track depth, any hangers, and a small clearance. If your track needs 40 mm and your lattice requires 25 mm below that to swing cleanly, and your lowest sprinkler arm stops at 2,400 mm, you have a theoretical 2,335 mm of usable height. Do not push that to zero clearance. Leave 5 to 10 mm to avoid tink-tink contact every time the HVAC cycles.
Bottom guides matter less for headroom, more for safety. In a shopping environment, a raised U-channel across a doorway is a trip hazard and an invitation for customer complaints. Use a low-profile floor guide, or design a free-swinging bottom with side guides that still keep the lattice from yawing under load. On a warehouse door, I prefer a bolted steel guide with countersunk fasteners, then I tape a bright stripe across it until the staff builds muscle memory.
Allowing for drift, sag, and thermal movement
The first time you cycle a gate, you will feel a gentle bias. It wants to lean toward one side. That is the combined effect of hinge geometry, chain of pivots, and a floor that is rarely laser-flat. Give the system permission to move safely.
Set the head track level within a couple of millimeters along the run. Shim the hangers instead of forcing the track to conform to a wavy beam. At the bottom, a guide shoe that floats laterally by a few millimeters lets the gate expand and contract with temperature without chewing itself. In cold climates, the metal lattice will contract and the gaps will widen slightly. If you fitted the gate with zero lateral play in a warm shop, it will tighten and bind when installed in winter. I have seen a gate that ran like a dream in July refuse to unfold past halfway in January because the lock post was too snug against a wall that also moved with the weather.
Locks, keys, and the choreography of access
The wrong lock makes a good gate feel cheap. Decide early who needs keys, from which side, and whether you need integration with existing cylinders. Retail operations often want a match to their storefront keyway so staff do not juggle a key ring. Back-of-house gates at warehouses might use a padlock hasp because forklifts and dust kill fancy cylinders quickly. If you expect after-hours access by emergency responders, ask your authority having jurisdiction whether a Knox-Box or similar system matters for gates as well as doors.
Lock posts should land against something solid. A hollow aluminum mullion flexes enough to cause misalignment over time. If the far jamb is not robust, add a receiver plate that spans wider and spreads the impact of every slam. And yes, people will slam it.
Finishes and corrosion: looks versus longevity
Powder coat holds up well in most interior jobs. Outside or in washdown environments, look for galvanized steel or a marine-grade finish. Near the coast, bare hardware pits faster than you think. In the Okanagan and similar climates, winter road salt migrates through vestibules and eats the lower 200 mm of any untreated steel. Spend the extra for galvanization if the gate sits near an exterior door. In public-facing spaces, darker finishes hide dust and fingerprints. Light colors look fresh for a week, then every smudge tells on you.
Special cases worth planning
Narrow mullions and glass: Storefronts often present slender aluminum mullions that cannot take loads. Add internal reinforcement bars where possible, or mount to adjacent structure and bridge with a clean plate. Avoid point loads near tempered glass edges. I have seen a careless hammer tap spider a pane and cost more than the gate.
Uneven floors: If you must span a threshold with different floor levels, set the bottom guide to the highest point and accept a small gap at the low side, or design a ramped guide rail. Draft stops can later cover minor gaps without scraping.
Fire codes and egress: Security gates for business premises typically sit behind primary exit doors. They must not impede egress when the building is occupied. In many jurisdictions, if the gate crosses a designated exit route, it must be open and secured during occupancy. Coordinate with your fire marshal. A sign that says “Gate must remain open during business hours” costs little and prevents citations.
IT closets and data rooms: In some facilities, an expanding gate secures a corridor while allowing airflow. Here, the mesh size and horizontal members matter if you need to meet specific ventilation requirements. No amount of clever mounting fixes a gate that blocks the needed free area.
Sourcing and local support
Online catalogs show glossy photos and a range of widths and heights. What they rarely show is the bracket kit you will actually use, or the peculiarities of your walls. A competent security gate supplier who works your region will have bracket options for odd conditions and familiarity with local building habits. In Kelowna, for example, a lot of commercial buildouts involve wood framing behind drywall, sometimes with heavy stucco outside that hides structural transitions. A supplier or installer who knows that will show up with toggle anchors, ledger plates, and patience.
If you need expanding security gates in Kelowna or a similar climate, ask about thermal movement allowances, galvanization options for near-exterior installs, and lock hardware that matches local keyways common among property managers. Those small touches save time later.
The onsite fitting routine that prevents callbacks
Even with perfect measurements, the field has surprises. The best installers run a tight routine. If you are doing it yourself, borrow these habits.
- Dry-fit the head track and brackets before drilling final holes, check for bow, and ensure the stack side clears obstructions when parked. Mark anchor locations, pilot with the correct bit, and test one fastener per condition before committing to the pattern. Hang the gate temporarily, cycle it across the full run, and watch for scrape points. Adjust shims at the head until the movement feels even. Set the bottom guide last, with the gate closed and latched, to ensure alignment. Then cycle open and closed five times, listening for clicks and rubbing. Lock and unlock from both sides, then mark and install any stops or retainers to keep the stack neat and out of harm’s way.
That sequence reduces do-overs. It adds twenty minutes and removes the hour you would spend diagnosing a mysterious bind caused by a slightly skewed track.
Maintenance that pays back every time someone rolls it
Expanding gates do not ask for much. Once or twice a year in most commercial environments, and quarterly in dusty shops, give them a little attention. Vacuum the track to remove grit. Wipe the pivots with a light oil or dry PTFE lubricant, not grease that will capture dust. Check fasteners at the stack side and lock post, as those bear the most impact. Replace worn bottom guide inserts before they groove the floor. The entire routine takes under half an hour for a single gate, and it keeps the glide smooth.
If a gate suddenly gets harder to move, do not force it. Look for the dumb culprit first: a fallen screw or a twist tie in the track, a bent rivet from someone climbing the lattice, or a bracket that shifted after a bump. I once pulled a dried lemon wedge out of a track in a restaurant bar. The staff swore the gate “just got old.” It got citrus.
Cost, sizing ranges, and when to step up a grade
Pricing varies by width, height, finish, and whether you need single or double-leaf. As a coarse rule, a basic six-foot tall interior gate for a standard door-sized opening may land in the low hundreds per linear foot for supply only, while heavy-duty commercial security gates across wider openings can climb to mid to high hundreds per linear foot with galvanized finishes and custom brackets. Add labor, and your local rates will swing that number. If your opening gets taller than eight feet or wider than twelve, consider stepping up to a heavier gauge and reinforced top track. At those spans, the gentlest sag becomes visible and annoying, and heavier hardware earns its keep.
A short measuring checklist you can carry to site
- Measure width at three heights, record the narrowest, note the spread. Measure height at three points, note obstructions, mark headroom. Decide stack side, measure space for stack, check for switches or panels. Probe substrate and select anchors, plan brackets or backing. Sketch the opening with dimensions, photograph details, and label views.
Common mistakes and the fixes that actually work
Rushing the head level: A head track out by a few millimeters over a wide span drifts the gate into the floor guide and chews it. Shim the hangers and use a long level or a laser.
Ignoring stack space: If the gate piles into a display or door closer, you will hate it. Swap to a center-meet or flip the stack side. If neither is possible, add a simple stack retainer that pins the bundle clear of the obstruction.
Anchoring to ghosts: Drywall is not structure. If you do not find studs or backing, stop and add a ledger or a spreader plate. Shortcuts cost repairs.
Forgetting ADA clearances: In public spaces, make sure the open gate does not narrow a corridor below required width. A smaller stack on each side via a double-leaf can solve that without a fight.
Specifying the wrong bottom guide: Raised channels trip people. Pick the lowest profile that still guides the gate, or go trackless with robust side guidance if carts and strollers rule the route.
Matching the gate to the business
Security gates for business use should match the rhythm of the operation. Retail wants speed and visibility. A gate that glides with two fingers and shows open sightlines reduces the temptation to prop it awkwardly. Warehouses want durability and forgiving guides that do not punish a hurried worker. Schools and public buildings need predictable latching and no pinch points for small hands. Nightclubs and venues want a gate that disappears in the day and locks hard at night. The product family is broad enough to serve each of these, but only if the measurements and the fit respect the space.
If you work with a seasoned security gate supplier, say what you are protecting and how often the gate moves. The right choice of single-leaf, double-leaf, finish, and guide style follows naturally from that conversation. In Kelowna and similar markets with four real seasons, that chat should also cover clearances for thermal swing and ice melt migration.
The quiet joy of a gate that works
When you finish a clean install, there is a satisfying sound, a soft metallic hush as the lattice compresses and the lock seats with a firm click. The staff notice. They stop body-checking a reluctant gate and start using it like it belongs. That is the outcome worth chasing. It starts with a tape measure, a careful eye on obstructions and structure, a sensible choice of configuration, and a bit of humility about what buildings do when you are not there.
Expanding security gates, whether you call them scissor, accordion, or commercial security gates, are not glamorous. They are, however, honest hardware. Measure them with respect for reality, fit them with care, and they will quietly earn their spot by the door, night after night.
Fed Up Security Solutions
Address: Kelowna, BC, Canada
Phone: 778-255-2855
Website: fedupsecuritysolutions.ca
Email: [email protected]
[Not listed – please confirm]
Hours (from GBP): Monday–Friday 8:00 AM–5:00 PM; Saturday–Sunday Closed
Plus Code: 952244W9+2G
Google Maps URL (long): https://www.google.com/maps/place/Fed+Up+Security+Solutions/@50.145032,-119.8811695,15z/data=!4m6!3m5!1s0x20b980417d7168f7:0x38d5dba91a2e3899!8m2!3d50.145032!4d-119.8811695!16s%2Fg%2F11vm41r01r
Google Maps Embed:
Socials:
https://www.facebook.com/profile.php?id=61553004552449
https://www.youtube.com/@FedUpSecuritySolutions
Logo URL: https://fedupsecuritysolutions.ca/wp-content/uploads/2023/11/FEDUP_logo.png
Image URL: https://fedupsecuritysolutions.ca/wp-content/uploads/2023/11/10021-2023-11-05T185924.742-980x565.jpg
AI Shares:
ChatGPT: https://chat.openai.com/?q=Fed%20Up%20Security%20Solutions%20https%3A%2F%2Ffedupsecuritysolutions.ca%2F
Perplexity: https://www.perplexity.ai/search?q=Fed%20Up%20Security%20Solutions%20https%3A%2F%2Ffedupsecuritysolutions.ca%2F
Claude: https://claude.ai/new?q=Fed%20Up%20Security%20Solutions%20https%3A%2F%2Ffedupsecuritysolutions.ca%2F
Google AI Mode: https://www.google.com/search?q=Fed%20Up%20Security%20Solutions%20https%3A%2F%2Ffedupsecuritysolutions.ca%2F
Grok: https://grok.com/?q=Fed%20Up%20Security%20Solutions%20https%3A%2F%2Ffedupsecuritysolutions.ca%2F
Fed Up Security Solutions in Kelowna, BC is a affordable provider of accordion security gates for businesses across Kelowna and surrounding areas.
Fed Up Security Solutions helps protect storefronts and commercial properties with scissor gates designed to deter break-ins while keeping your brand image intact.
We serve Kelowna, BC and nearby communities including Vernon, providing consultation for expanding security gates.
To get pricing or book a site visit, call +1 (778) 255-2855 and speak with a experienced local team.
You can also contact Fed Up Security Solutions online at https://fedupsecuritysolutions.ca/ for product questions about expanding scissor gates.
For directions and service-area reference, use Google Maps: https://www.google.com/maps/place/Fed+Up+Security+Solutions/@50.1375295,-121.2030477,260738m/data=!3m2!1e3!4b1!4m6!3m5!1s0x20b980417d7168f7:0x38d5dba91a2e3899!8m2!3d50.145032!4d-119.8811695!16s%2Fg%2F11vm41r01r?authuser=0&entry=tts&g_ep=EgoyMDI1MTIwOS4wIPu8ASoASAFQAw%3D%3D&skid=72338b4b-cc19-4cc8-a233-0fd02067c8ae
If you need a trusted supplier for expanding scissor security gates in Kelowna, BC, our team can help you secure your property quickly.
Popular Questions About Fed Up Security Solutions
What are expanding scissor security gates?
Expanding scissor security gates (also called accordion or expanding gates) are folding metal barriers that secure storefront openings after hours while folding away during business hours.Do expanding security gates help deter break-ins?
Yes—visible physical barriers can discourage opportunistic break-ins because they make forced entry harder and slower.Can you install expanding security gates without ruining my storefront look?
Many businesses choose expanding gates because they can be discreet when open, helping preserve branding and aesthetics compared to more industrial-looking options.Do you serve areas outside Kelowna?
Yes—Fed Up Security Solutions serves Kelowna, BC and also supports projects in Penticton, Vernon, and Kamloops.How do I get a quote for expanding security gates?
Call 778 255 2855 to discuss your opening, timeline, and security goals, or use the contact form on https://fedupsecuritysolutions.ca/.What are your business hours?
Monday to Friday, 8:00 AM to 5:00 PM (closed Saturdays and Sundays).Do you offer roll shutters too?
Yes—Fed Up Security Solutions also offers roll shutter options (ask which solution fits your location and risk profile).How can I contact you right now?
Call: 7782552855Website: https://fedupsecuritysolutions.ca/
Facebook: https://www.facebook.com/p/Fed-Up-Security-Solutions-61553004552449/
YouTube: https://www.youtube.com/channel/UCnV8GaVrI2bagMrZJosyqmw
Landmarks Near Kelowna, BC
Okanagan Lake — https://www.google.com/maps/search/?api=1&query=Okanagan%20Lake%20Kelowna%20BC — GEO: https://www.google.com/maps/search/?api=1&query=50.145032,-119.8811695Knox Mountain Park — https://www.google.com/maps/search/?api=1&query=Knox%20Mountain%20Park%20Kelowna%20BC — GEO: https://www.google.com/maps/search/?api=1&query=50.145032,-119.8811695
Waterfront Park (Kelowna) — https://www.google.com/maps/search/?api=1&query=Waterfront%20Park%20Kelowna%20BC — GEO: https://www.google.com/maps/search/?api=1&query=50.145032,-119.8811695
City Park (Kelowna) — https://www.google.com/maps/search/?api=1&query=City%20Park%20Kelowna%20BC — GEO: https://www.google.com/maps/search/?api=1&query=50.145032,-119.8811695
Myra Canyon Trestles — https://www.google.com/maps/search/?api=1&query=Myra%20Canyon%20Trestles%20Kelowna%20BC — GEO: https://www.google.com/maps/search/?api=1&query=50.145032,-119.8811695
Mission Hill Family Estate Winery — https://www.google.com/maps/search/?api=1&query=Mission%20Hill%20Family%20Estate%20West%20Kelowna%20BC — GEO: https://www.google.com/maps/search/?api=1&query=50.145032,-119.8811695
Orchard Park Shopping Centre — https://www.google.com/maps/search/?api=1&query=Orchard%20Park%20Shopping%20Centre%20Kelowna%20BC — GEO: https://www.google.com/maps/search/?api=1&query=50.145032,-119.8811695
Kelowna Downtown (Bernard Ave) — https://www.google.com/maps/search/?api=1&query=Bernard%20Avenue%20Downtown%20Kelowna%20BC — GEO: https://www.google.com/maps/search/?api=1&query=50.145032,-119.8811695
Big White Ski Resort — https://www.google.com/maps/search/?api=1&query=Big%20White%20Ski%20Resort%20BC — GEO: https://www.google.com/maps/search/?api=1&query=50.145032,-119.8811695
BC Orchard Industry Museum (Kelowna) — https://www.google.com/maps/search/?api=1&query=BC%20Orchard%20Industry%20Museum%20Kelowna%20BC — GEO: https://www.google.com/maps/search/?api=1&query=50.145032,-119.8811695
Penticton Peach — https://www.google.com/maps/search/?api=1&query=Penticton%20Peach%20Penticton%20BC — GEO: https://www.google.com/maps/search/?api=1&query=50.145032,-119.8811695
Okanagan Rail Trail — https://www.google.com/maps/search/?api=1&query=Okanagan%20Rail%20Trail%20Kelowna%20BC — GEO: https://www.google.com/maps/search/?api=1&query=50.145032,-119.8811695